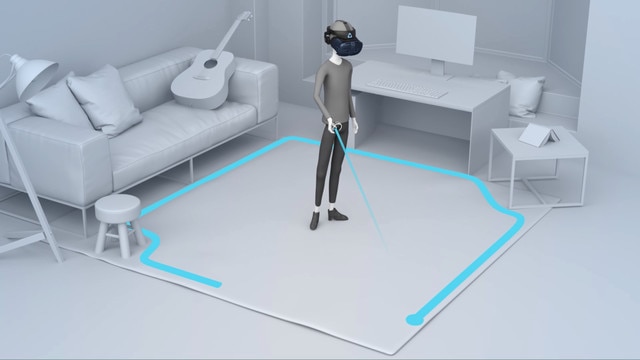
The following instructions are taken from the HTC Vive website.
Setting up your play area
The play area is a space in your environment that you designate for VR use. A safety boundary appears when you're close to the edges of your play area.
When you set up a Room-scale play area, you'll need a space measuring 1.5 × 1.5 m that's free from obstacles such as objects, pets, and people. If you don't have that much space, you can also set up a Stationary play area so you can interact in VR while sitting or standing.

During setup, you'll be guided with instructions on how to use hand gestures or controllers to set up your play area.
- Set your floor position. Use your hand or controller to push down the virtual floor to match it with your physical floor.
- Choose to set up a Room-scale or Stationary play area.
- If you choose Room-scale, draw the boundary of your play area.
- Pinch and hold on a starting point with your fingers, or press and hold the trigger on a starting point.
- Trace along the floor to draw the boundary. For your safety, make sure to exclude any obstacles in your environment.
- Set your front-facing view in VR. This is where menus, dialog boxes, and messages will appear.
Tip:
- If you move your headset to another location and put it back on, the headset will prompt you to set up your play area again.
- You can go to Settings and select Boundary to reconfigure your front-facing view, floor position, safety boundary, and other boundary settings.
Taking screenshots and screen recordings
You can capture screenshots and record videos of what you're viewing on the headset so you can share or view them later. Your headset also allows screen capture and recording in passthrough mode.
Tip: To enable screen capture and recording in passthrough mode, go to Settings, select Advanced > Camera settings, and then turn on Allow passthrough recording and casting.
Use the following methods to capture screenshots or record videos:
| Method | Steps |
|---|---|
|
Capture a screenshot |
Do either of the following:
|
|
Record your screen |
Do either of the following:
|
|
Capture a screenshot or record videos with a timer |
|
 to take a screenshot or select Start recording
  to record your environment. The headset will take the screenshot or start capturing video after a 3-second delay.
 .
.